
How to Wedge Clay Properly: A Step-by-Step Guide for Consistent Results
Wedging evens out moisture and pushes air from clay, and the method matters. Here is how to spiral-wedge and ram's-head with confidence, plus when to stop.
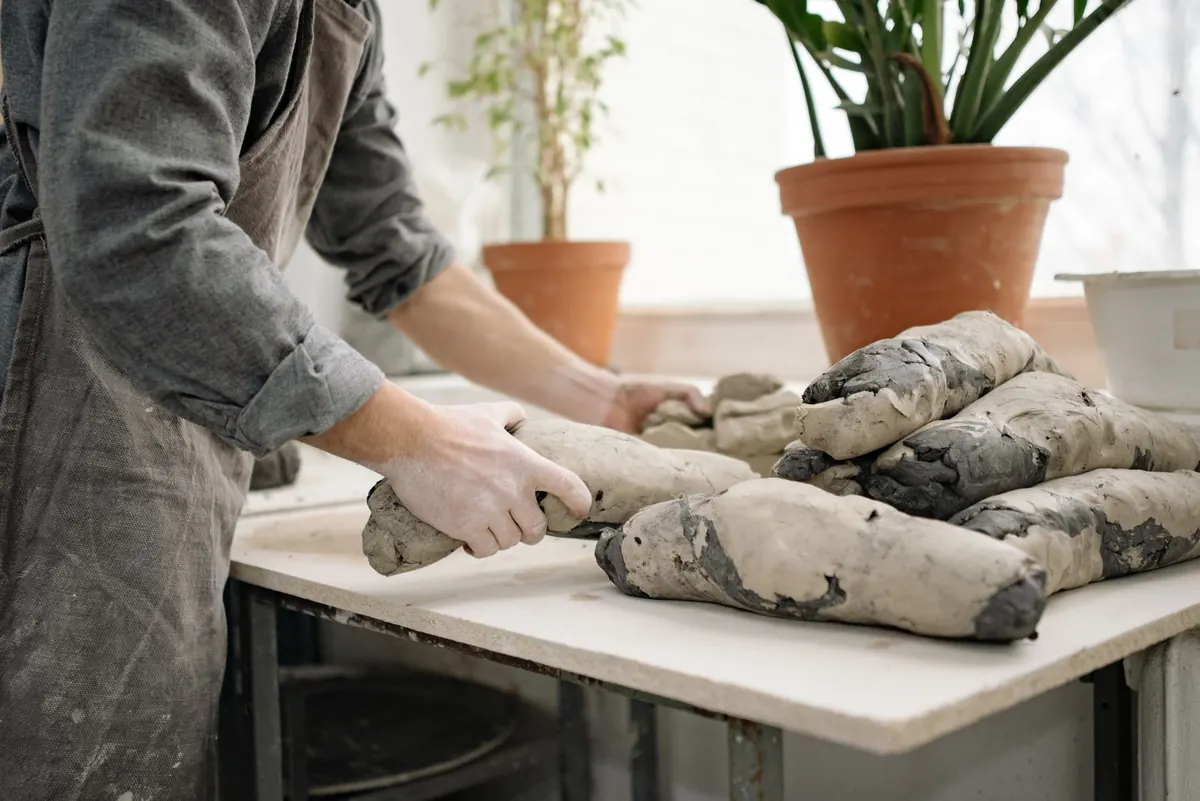
There is a moment in almost every pottery session when someone pulls a block of clay from the bag and goes straight to the wheel. It holds for a minute. Then a wall goes lopsided, a bubble opens up and the cylinder folds in on itself. Almost always, the clay was never wedged properly. Wedging is the least glamorous step in ceramics and the one that quietly decides whether the rest of your work goes smoothly. Get it right and throwing feels cooperative, hand-built slabs hold their shape, and joins stay put. Get it wrong and you spend the afternoon fighting your own material.
What Wedging Actually Does
Clay comes out of the bag or the reclaim bucket with an uneven distribution of water and a certain amount of trapped air. It also has whatever texture it picked up while sitting in storage, which potters loosely call clay memory. Wedging addresses all three at once: it spreads moisture through the mass, presses out pockets of air, and lines the particles up in a consistent pattern so that the clay behaves the same way in every direction.
This is not the same motion as kneading bread. Bread dough wants gluten development and a good stretch. Clay wants compression and folding. You are not trying to aerate it or make it springy. You are trying to make it dull, even and predictable — the most useful thing clay can be.
Set Yourself Up First
Five minutes of preparation saves a great deal of swearing later.
- Work in batches you can control. Around one to two kilograms is plenty for most people. A ten-kilo block fights back; split it.
- Choose your surface deliberately. A wooden table, canvas-covered board or plaster bat all work. Plaster pulls moisture out of wet clay, which is helpful for reclaim and less helpful if your clay is already at the right consistency.
- Keep your hands and the surface just damp. Wet hands make sticky clay. If the clay starts clinging, dry your hands rather than adding water.
- Bring the clay to room temperature if you can. Cold clay from a garage or shed is stiff and reluctant. Let it sit indoors for a few hours.
Spiral Wedging, Step by Step
Spiral wedging — sometimes called cone-and-spiral — is the standard method for clay that is soft enough to move easily. It works the whole mass in one continuous motion rather than in separate lumps.
- Roll the clay into a rough cone with the tip pointing up and tilted slightly toward you.
- Place your left hand on the near side of the cone, heel down, fingers wrapping the side. Your right hand steadies the far side.
- Press down and away from your body with the heel of your left hand, compressing the clay and lengthening it forward.
- Fold the far edge back over the top toward you, pressing the fold firmly so no air is trapped underneath.
- Rotate the cone a small amount — perhaps a tenth of a turn — and repeat.
- Keep the tip upright and keep returning to the same spot, so the folds land in a spiral rather than stacking on top of each other.
After a couple of minutes you should see a spiral pattern on the top of the cone, like a snail shell, and the clay should feel the same under your hand at every point. That spiral is your visual proof that the whole mass has been worked, not just the outside. Finish by shaping the clay into a ball or a throwing cone, then set it aside under plastic.
A note on the fold
Aerated clay is almost always the result of a lazy fold. If you lay the far edge over the top without pressing it home, you trap a thin pocket of air that will show up later as a blowout in a wall or a blister in a glaze firing. Press each fold down before you rotate.
Ram's Head Wedging for Stiffer Clay
Ram's head is the right choice for firmer clay, reclaimed scraps, or any body that resists being pushed around. It looks aggressive and is actually quite controlled.
- Set the clay on the table as a rough block, slightly higher at the back.
- Place both hands on the block, heels forward, fingers curved — roughly the shape of a ram's head.
- Press down and forward with both heels, driving the clay away from you and compressing it.
- Fold the far edge back over toward you, or cut the block with a wire and slam the pieces back together.
- Turn the block a quarter turn and repeat.
Rotating matters. If you always press in the same direction you build up a single plane of weakness, and the clay will part along that line when you throw it or bend a slab. Cross the directions and the structure stays uniform. For a couple of kilos of firm clay, expect somewhere in the region of fifty passes; for stiff reclaim, more.
There is a third method worth knowing: wire or slab wedging. Slice the clay into thin slabs, stack them, and slam the stack down, repeating a few times. It is quick, effective for grogged bodies, and a good way to blend two clays together.
How Much Wedging Is Enough?
Stop guessing and cut the clay. Run a wire through the middle of the mass and look at the cut face.
- Even colour and texture — you are done.
- Small dark holes — trapped air. Keep going.
- Darker, wetter patches — moisture has not equalised. More wedging, or rest it wrapped for a few hours.
- Streaks or swirls of different clay — still blending. Continue.
As a rough guide, three to five minutes of steady spiral wedging will handle a couple of kilos of well-conditioned clay. Firm clay, reclaimed clay and anything you have just mixed takes longer. But the cut face is more reliable than a stopwatch, and the feel of the clay under your hands is more reliable still — it should press back with the same resistance everywhere.
One more habit that pays off: after wedging, wrap the clay in plastic and leave it for an hour or overnight. Wedging moves moisture around; resting lets it settle evenly. Clay that has rested throws noticeably better than clay straight off the table.
Warning Signs You Have Overworked the Clay
Wedging has a limit. Push past it and the clay stops improving and starts degrading. Watch for these signals.
- Stickiness. The surface turns glossy and clings to your hands and the table. Warmth from your hands is drawing water to the surface.
- Slumping. The clay no longer holds a form well, and thrown walls feel soft and unsteady.
- Loss of plasticity. Roll a coil and bend it; if it cracks readily, the body has gone short.
- A sour smell. Over-wet, over-worked clay left warm encourages bacterial growth. It is not dangerous to handle, but the clay is unpleasant to work with.
- Tearing during throwing. The clay splits rather than stretching, a sign the structure has been broken down.
The fix is almost never more working. Do not add water. Spread the clay out on a plaster bat or a dry board for half an hour, cover it, and let it rest. If it has gone short or sour, dry it out and put it through the reclaim process rather than wrestling with it further. Clay is forgiving, but it does keep score.
Make It a Habit, Not a Chore
Wedge everything, every time, and do it before you are in a hurry. The three minutes you spend at the start of a session will save you ten minutes of collapsed cylinders and patched slabs later, and the difference in how the clay responds under your hands is obvious the first time you compare.
Keep a few practical habits alongside it. Cover wedged clay so it does not skin over. Label batches with the date if you are working through reclaim. Keep your trimmings and scraps damp, wipe surfaces with a sponge rather than sweeping them dry, and remember that settled clay dust is the real health concern in a studio — wet cleaning is always the better choice. None of that is complicated. Neither is wedging. It just needs doing, properly, before the good part starts.
Photo: Yan Krukau / Pexels